There’s nothing worse than spending a ton of time and money traveling to a beautiful place only to realize the pictures you took are absolute garbage. One of the best parts of traveling is being able to take home amazing memories. An easy way to access those memories is with photos. You don’t want to look back at your photos 10 years from now and think “I swear that place was prettier than that.” Thankfully there is an easy way to fix your pics.
While Lacey and I are by no means professional photo editors, we have found a quick and easy solution to fixing some of the god awful pics we take. We use a free (yes, free!) photo editing software called the Nik Collection, by Google. As always, a reminder that we don’t get paid to promote anything; we just honestly love this editing software.
While there is literally an entire ‘collection’ of free Google photo editing software you can download here, the product we end up using the most is the Color Efex Pro. Within Color Efex Pro, we typically only use 2 of the editing options – Darken/Lighten Center and Brilliance/Warmth. These 2 settings make it easy to brighten up dark sections of your photos and also make the colors pop. These are the only 2 settings we used to fix the picture below.
I know many of you could make this pic look even better, but we’re pretty satisfied by being able to make the terrible original pic look halfway decent. At least you can see our faces now! This pic was actually take a few hours before I proposed so it means a lot to me to be able to brighten up this one. Thanks Googs!
Let us know if you give the Nik Collection a shot! Send us some examples of the pics you edited.
Good luck with your edits!
Below are a handful of pics from our engagement trip to Italy from a few years back. Both our camera and our picture taking skills were awful at the time, but we were able to salvage most of the pics with the Nik Collection. Take my word for it, before I edited the pics below, they were borderline unusable.
A few days before we left on our big trip, Mat and I each had a test run packing our new backpacks. On previous trips we have borrowed travel backpacks from family (thanks Sarah!) but finally made the investment in our own. I always pack too much and then regret it as I’m lugging around extra shoes and outfits that I “just couldn’t leave”, meanwhile my spine feels like it’s being compressed and my shoulders ache. I decided to buy a smaller backpack to force myself to pack lighter. That is crazy if you know me, because I love having a variety of clothing to choose from. I have been known to change outfits during my lunch break. It’s crazy, I know.
I ended up with the Osprey 36 L women’s backpack and Mat chose a simple REI 40L He chose the simple style on purpose because he hated having to deal with all of the extra fancy zippers, ties, and bells and whistles that come with a typical hiking/camping/travel bag. He also wanted a smaller and more sleek fit so he didn’t feel like he was constantly bumping people with his huge backpack.
We had read online that packing cubes are a must when backpacking, as it helps with efficiency when trying to find an item and saving room. Mat ordered these from Amazon and mine were a gift from the Easter Bunny. 🙂 I have three total: a small, medium and large. Mat’s packing cubes came in a group of five, but he is using only three: small and two mediums. We are working on mastering the art of rolling for maximum space.
In my largest packing cube I fit two pair of pants, two pair of leggings, one maxi dress, one maxi skirt, sleep shorts and workout shorts. A total of seven bottoms and a dress. The middle sized packing cube was for my tops, which fit four tank tops, three short sleeve shirts, one sweater, one cardigan and a swimming suit. The smallest cube is for socks and undergarments, which held a total of 13 items and definitely wasn’t full.
These three cubes plus a pair of sandals and a pair of Converse still only filled about 2/3 of the bag. So awesome! The rest of the empty space will be filled with toiletries, so hopefully it all works! Also, there is a special zipper at the bottom of the bag that holds my raincoat.
Mat was able to fit 11 tops, six bottoms, a rain coat, 12 undergarments and a nice pair of shoes in his bag thanks to his packing cubes. He is using the two medium sized cubes for tops and bottoms, while the smallest is for undergarments. Mat was even able to utilize his outside mesh pockets to hold other miscellaneous items that we will be taking i.e. laundry detergent, first aid kid, and ginger candies (for my nausea).
You better believe our hip belts carry snacks like protein bars, dried fruit, granola, etc. We can’t go anywhere without our snacks!
Do you know any secret packing tips or advice to share with us?
Anytime someone tells me they have a vacation coming up and I ask “got everything dialed in for your trip?” and they answer “meh, we’ll figure it out when we get there”, I wanna blow my brains out. Not because they don’t have a bunch of events/excursions/tours booked, but because they haven’t put thought about ANY of the details that could literally make or break their trip. Packing, food, transportation, hotels, dining, site seeing, etc. are all things you can have figured out before you head to your destination.
Being that Lacey and I are super OCD when it comes to this topic, we’re going to share our thoughts in a multi-post, Travel Prep, series.
First up – Public Transportation
Alright, so let’s say you’ve just arrived at your destination (by using our best practices for booking a free flight of course 😉 ). When you walk off the plane and out those airport doors to a city you’ve never been to, do you have a plan? If not, you’re already wasting precious vacation time and you’re likely feeling super awkward and uncomfortable…not to mention standing out like a sore thumb as being a dumb shit tourist. Not only does it totally suck to be in this position, it also lets any scam artist know that you’re a easy target.
We’ve all been there, I know I have. It is an overwhelming and embarrassing feeling. Well here’s the good news, you never have to go through this again if you spend a little time before-hand doing some public transportation Travel Prep.
Start by doing a Google search on your destination city. Get an idea of all forms of public transportation available. Do they have a metro? Do they only have buses? Do they have both? I know most cities have taxi/uber services, but why spend $50 getting to your hotel when the metro costs $2? Spend that extra cash on a celebratory “we’re here!” bottle of booze at dinner that night.
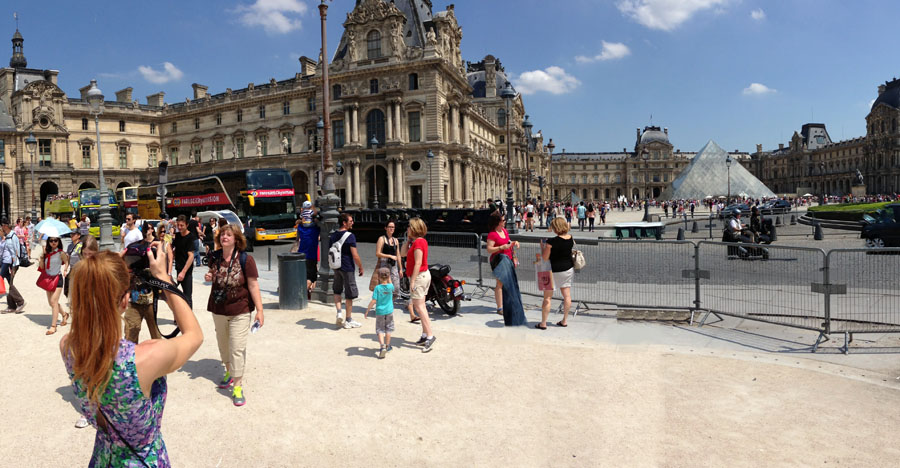
Buses in Paris will drop you off right outside the Louvre.
Did you pick your preferred form of public transportation? Now find out if you can pre purchase a travel pass online and have it mailed to you. Overkill? Maybe, but this will help you avoid a confused walk around the metro or bus station looking for a way to purchase your ticket. You’ll already have your pass in-hand, ready to use, like the rest of the locals. Even though it’s pretty easy to find a ticket machine at a metro or bus station, I’ve run into many cases where the ticket machines are out of order OR for some reason they only accept certain types of payment. Just a couple of the reasons to buy your pass before your trip if it’s an option.
Taking this a step further, most transportation services now have YouTube vids on how to use/swipe their cards at the station. Watch these vids a few times to get super comfortable with the process so by the time you get to the station you’re a pro. No more holding up lines while you get stuck at the subway turn style.
Below is an example vid for Chicago’s Ventra Card. Kind of a silly video, but at least you’ll feel dumb in the comfort of your own home instead of in a crowded train station.
Ok, great, so you made it to the train station and through the turn style gates. Now what? None of the giant signs have the name of your exact stop on ’em…shit! Are you in the right place? Where do you go? What train are you supposed to get on? Again, the feeling of being an awkward dumb ass rushes over you. But wait, you can avoid this hiccup too!
Here’s where the internet comes in handy again. Once you’ve decided which form of public transportation you want to use (before your trip), look up their daily routes and departure/arrival times. You’re looking for a map similar to the one I found below for our upcoming trip to Rome. I know that we’ll be starting at the TERMINI station and that we’ll need to get to the S. Pietro (St. Peter’s Basilica) stop. The Ottoviano/S.Pietro stop will NOT be on the main signs in the TERMINI station. Instead the signs will have the final destination of that route on the sign. So for the example below, I will be looking for the red line to Battistini. I know that our Ottoviano/S.Pietro stop will be the 6th stop along the way.
Making this even easier, nowadays there are TONS of public transportation apps you can download that will help with your trip. These apps will give you all of the routes and arrival times. Here is a really cool public transit app that we’ve been using lately. You can also do a simple AppStore/Google Play search for “Your City + Public Transportation”.
Simple enough right? For a lot of you, this might be common sense. For the rest of us that drive cars everyday instead of using public transportation, this can be intimidating. It definitely was for me. By spending just a few minutes researching this stuff before your trip, you can take the stress off of a big portion of your trip. Being in a new city is overwhelming enough with all of the new sites and sounds, the last thing you want to worry about is getting lost. Spend less time being lost and confused and spend more time enjoying your trip!
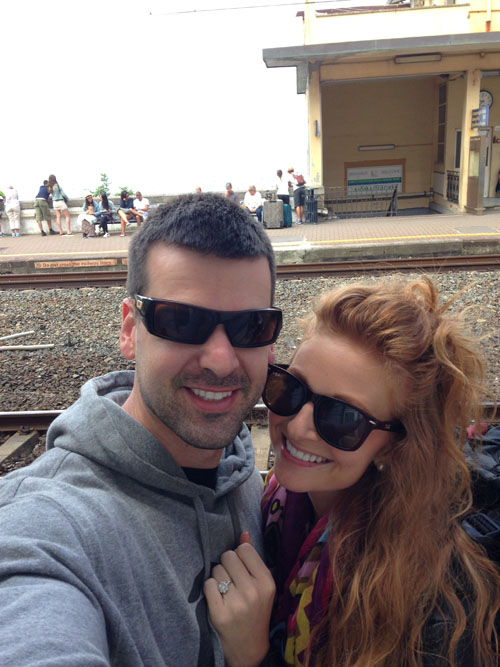
Train Station in Riomaggiore, Italy the day after getting engaged!
I hope this helps! Let us know if you have any questions.